Walkthrough: Using the sample notebooks remotely from Unix
In this article you'll learn how to use systemathics/notebook-examples with Ganymede public endpoints from Unix
The sample notebooks are directly usable in the Web hosted Jupyter Lab. More advanced users can also execute them locally on their computer and plug them to Ganymede public endpoints from Unix.
This walkthrough can be used for Unix variants like Linux or MacOS and has support for Python and C#/F# notebooks.
Step 1 : Clone repository from github
We pre-suppose here that you're using Windows 10/11 with a functionning Windows Subsystem for Linux (WSL2) or a Linux box, with a few common tools installed (git, python, dotnet, visual studio code and docker)
# clone the systemathics/notebook-examples repository
git clone https://github.com/systemathics/notebook-examples/tree/{{ site.branch }}
The bash helpers scripts are located in the remoteaccess{{ site.svg_external_link }} folder.
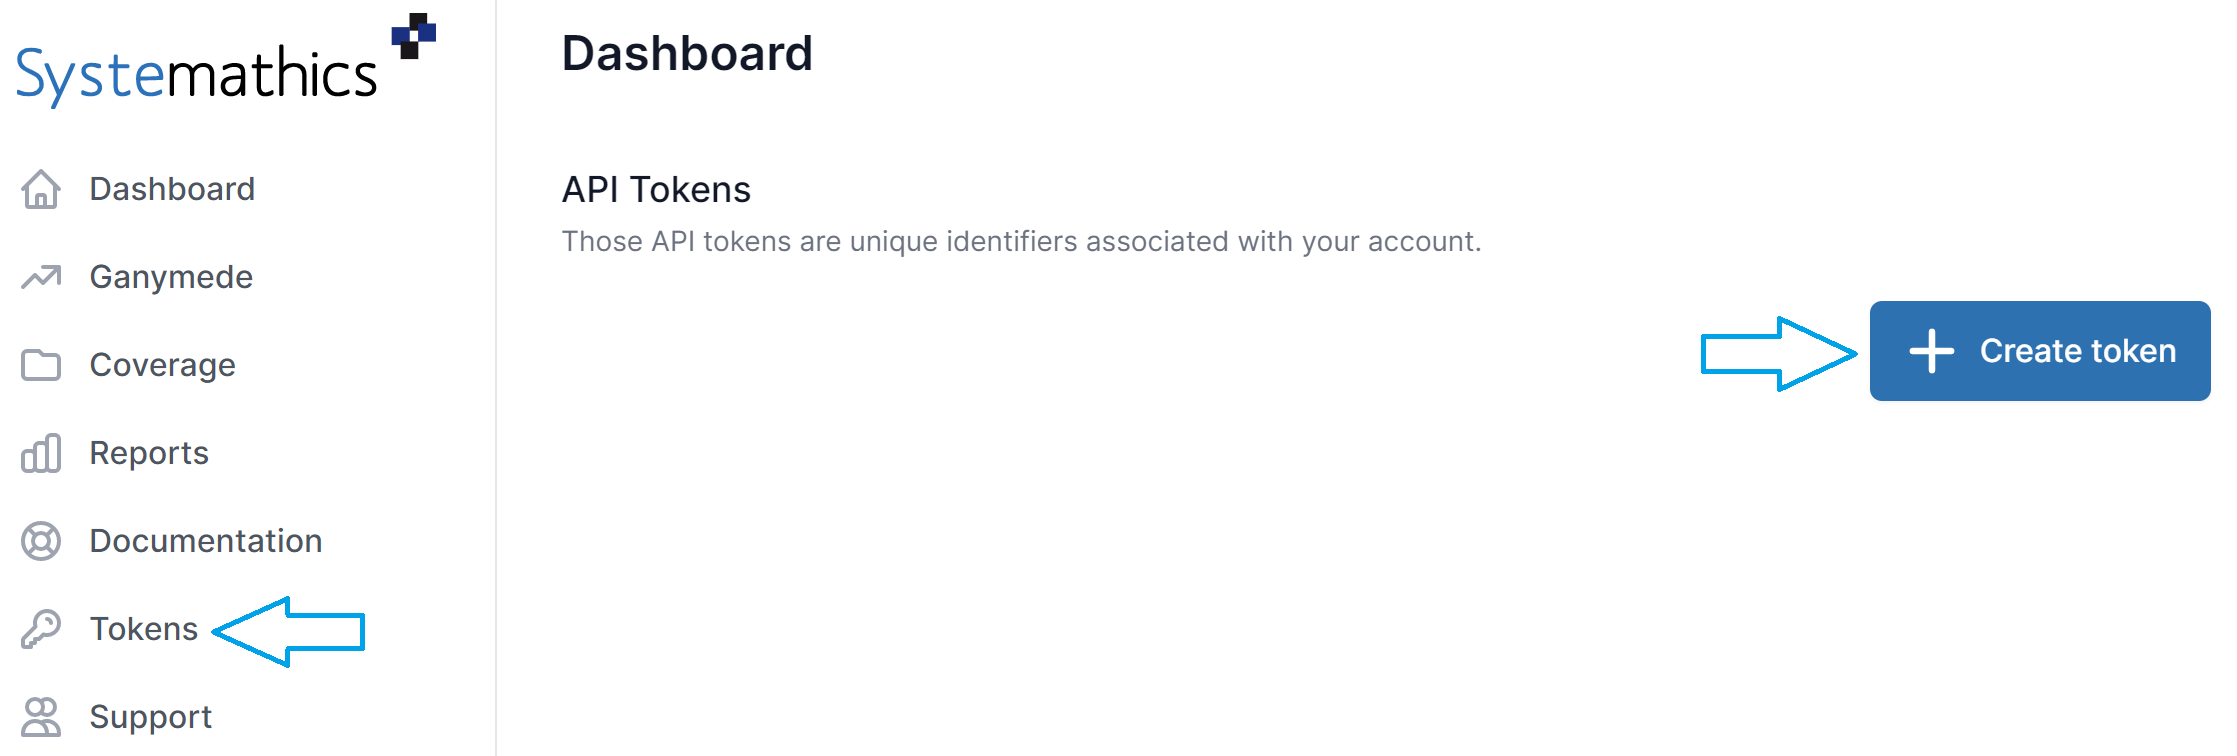
Step 2 : Create an authentication token from the dashboard
To authenticate against Ganymede API, you have to obtain a token. Go to tokens in your dashboard, then click "Create token".
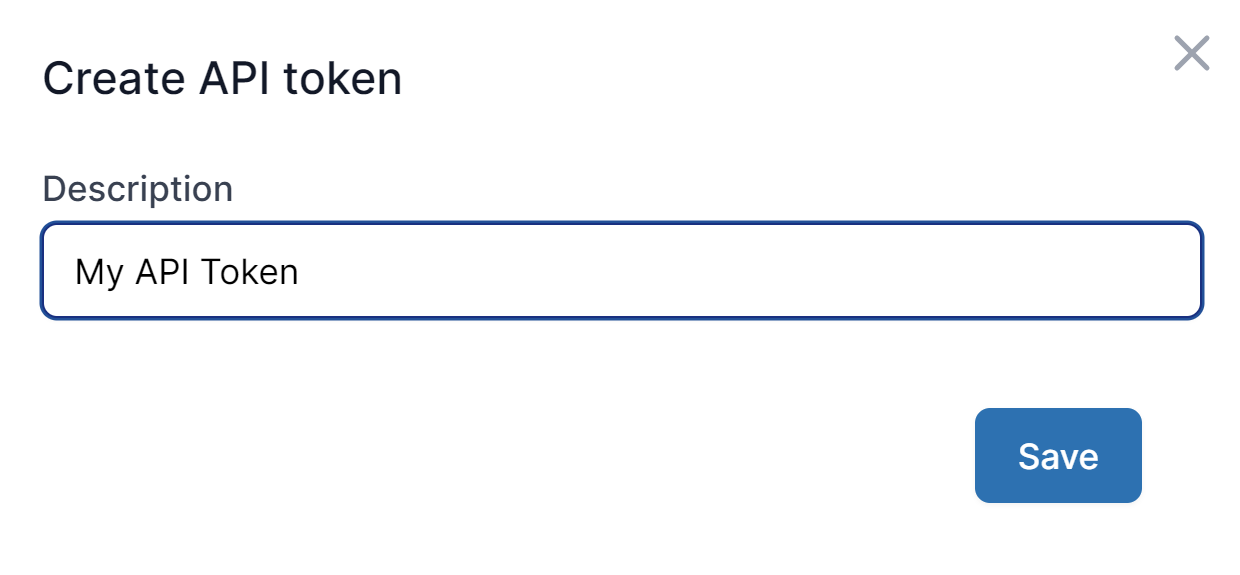
Input a name for your token, then click "Save"
a dialog will then appear, with detailed information about the newly created token.
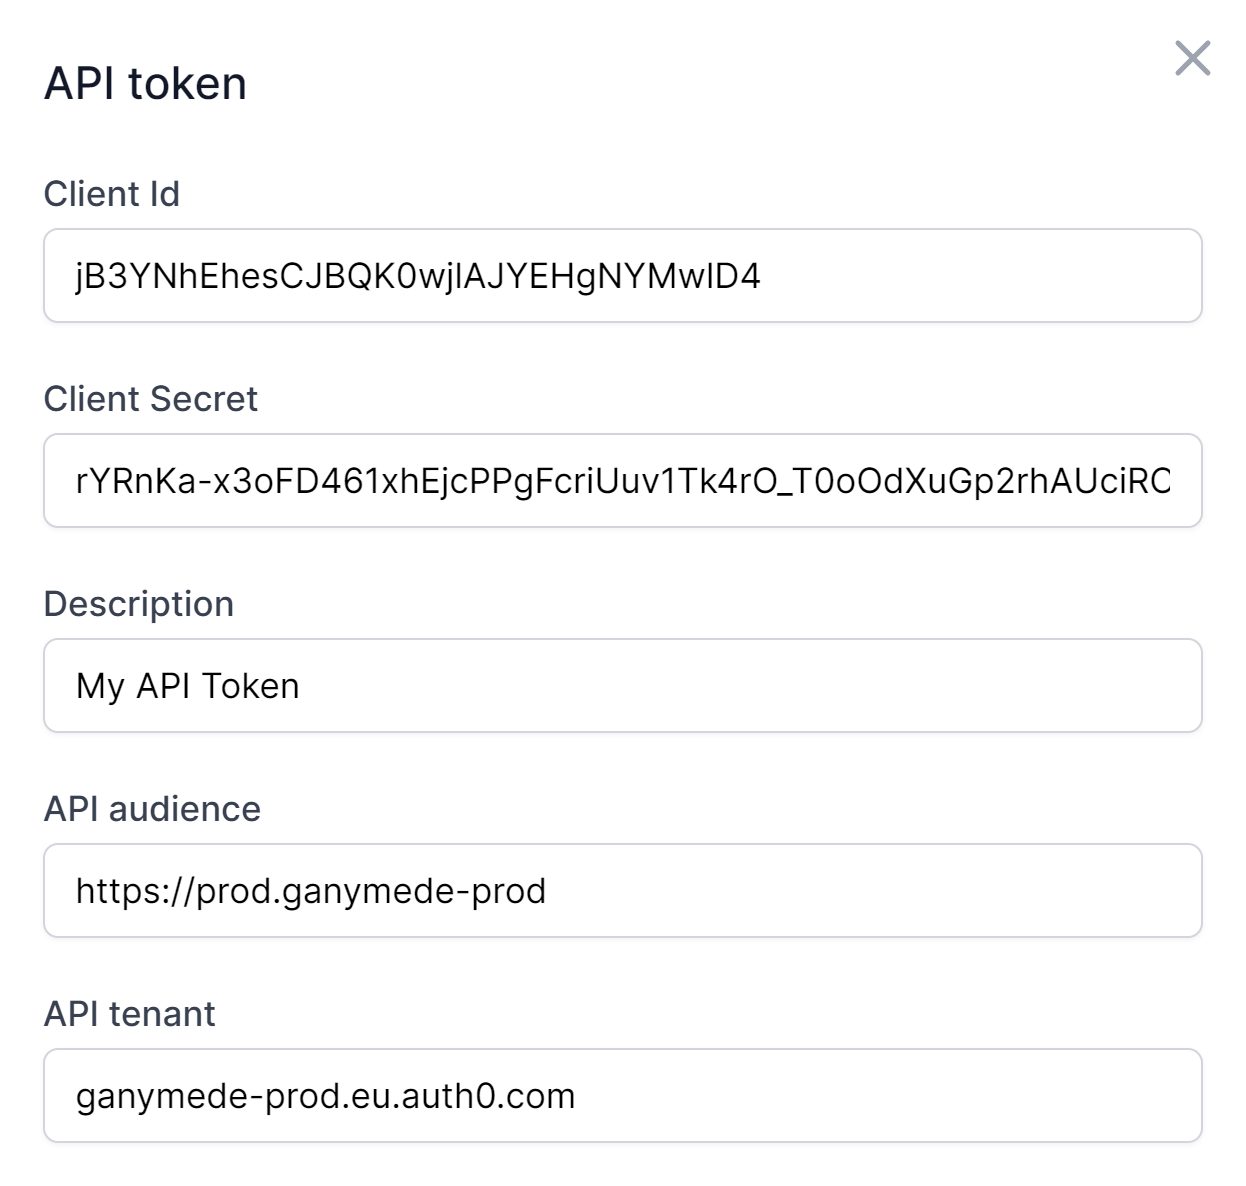
Ensure to keep the client secret handy as it won't be visible anymore after closing the dialog.
Your newly created token is now active.

Please note that this token is persistent across sessions, logging in and out won't affect it. To remove access you need to delete it manually.
Step 3 : Edit env.sh
The env.sh file is sourced by the other scripts, it holds the required environment variables to authenticate and access Ganymede public endpoints.
nano remoteaccess/env.shCopy/paste CLIENT_ID and CLIENT_SECRET as obtained above, then save.
# Fill-in the variables below
export CLIENT_ID="<please-fill-in-here>"
export CLIENT_SECRET="<please-fill-in-here>"
#export TENANT="<please-fill-in-here-if-non-default>"
#export AUDIENCE="<please-fill-in-here-if-non-default>"
#export GRPC_APIS="<please-fill-in-here-if-non-default>"

env | egrep '(CLIENT_ID|CLIENT_SECRET|AUDIENCE|TENANT|GRPC_APIS)'
Have a look at Template API call and Environment variables for a deep understanding on how environment variables work together with token helpers and channel helpers.
Step 4 : Ready to go
Everything is now ready to go.
You can opt for docker-jupyter-lab.sh or vscode.sh:
- vscode.sh will launch Visual Studio Code after sourcing env.sh.
- docker-jupyter-lab.sh python|dotnet will launch a docker container after sourcing env.sh.
To launch Visual Studio Code locally and connect to Ganymede public endpoints, use this:
./remoteaccess/vscode.sh
To launch a python enabled Jupyter Lab locally (stock image) and connect to Ganymede public endpoints, use this:
./remoteaccess/docker-jupyter-lab.sh pythonAnd point your browser to http://localhost:5678/?token=jupyter
To launch a dotnet-interactive enabled Jupyter Lab locally (custom image) and connect to Ganymede public endpoints, use this:
./remoteaccess/docker-jupyter-lab.sh dotnetAnd point your browser to http://localhost:6789/?token=jupyter